Ever brought home a beautiful snake plant, full of hope, only to watch it slowly (or quickly!) succumb to… well, something mysterious? You’re not alone. Many plant lovers are drawn to the snake plant’s striking architectural leaves and legendary resilience, only to find their specimen looking droopy, yellowing, or just plain sad. The culprit? Often, it’s too much love – specifically, too much water.
But what if I told you that mastering snake plant care indoors is genuinely one of the easiest paths to indoor gardening success? Forget the black thumb myth! With a few simple, counter-intuitive principles, your snake plant (also known as Sansevieria or Mother-in-Law’s Tongue) can not only survive but truly thrive for decades, purifying your air and adding sculptural beauty to any corner of your home. This comprehensive guide dives deep into everything you need to know about snake plant care indoors, transforming you from a worried plant parent into a confident Sansevieria sage.
Table of Contents
Understanding Your Snake Plant: The Desert Dweller
Snake Plant 101: Why “Neglect” is Often Best
Origins Matter: Native Habitat Insights
Snake plants (primarily Sansevieria trifasciata and its cultivars) hail from the arid, rocky regions of West Africa. This origin story is crucial for understanding their care needs. They evolved to endure long periods of drought, intense (but often filtered) sunlight, and poor soil conditions. Their secret weapons? Thick, succulent-like leaves that store significant amounts of water, and rhizomes – underground stems that also store water and energy, allowing the plant to regenerate even if above-ground parts suffer.
The Air-Purifying Powerhouse (With a Caveat)
You’ve likely heard snake plants are fantastic air purifiers. This reputation stems primarily from a famous NASA Clean Air Study conducted in the late 1980s. The study found that Sansevieria was effective at removing certain volatile organic compounds (VOCs) like benzene, formaldehyde, trichloroethylene, xylene, and toluene from sealed chambers in a lab setting. While the extent of their impact in a typical, non-sealed home environment is debated, there’s no denying they contribute positively to indoor air quality. More importantly, they add oxygen, especially at night through a process called Crassulacean Acid Metabolism (CAM), making them popular bedroom plants.
The Golden Rules of Snake Plant Care Indoors
Mastering these core principles is the key to a perpetually happy snake plant:
Light: Low Light Tolerance ≠ Low Light Preference
- The Myth: Snake plants are often marketed as “low light plants.” While they tolerate low light far better than many houseplants, they won’t thrive or grow significantly there.
- The Ideal: Bright, indirect light is the sweet spot. Think near an east or west-facing window, or a few feet back from a south-facing window (in the Northern Hemisphere). Some morning or late afternoon direct sun is usually fine and can encourage stronger growth and better variegation (those lovely yellow edges!).
- Low Light Survival: Yes, they can survive in darker corners or rooms with only artificial light. However, expect very slow or no growth, less vibrant color, and a plant more susceptible to overwatering issues. Rotate the plant occasionally for even exposure.
- Too Much Light: Intense, direct midday sun (especially through south-facing windows in summer) can scorch the leaves, causing brown, crispy patches. If this happens, move the plant further back or filter the light with a sheer curtain.
Watering: The #1 Killer (Hint: It’s Overwatering)
- The Cardinal Sin: Treating your snake plant like a thirsty fern. Overwatering leads directly to root rot – the most common cause of snake plant demise.
- The “Soak and Dry” Method is King:
- Step 1: Water thoroughly until water runs freely out of the drainage holes. Ensure ALL the soil gets saturated.
- Step 2: This is crucial: LET THE SOIL DRY OUT COMPLETELY. I mean completely. Stick your finger 2-3 inches into the soil. If it feels even slightly damp, wait. For larger pots, this could mean waiting weeks, even 1-2 months between waterings, especially in winter or lower light.
- Step 3: Repeat only when the soil is bone dry.
- Signs of Overwatering: Yellowing leaves (especially starting at the base), soft, mushy leaves, leaves folding over easily, foul odor from the soil.
- Signs of Underwatering: Wrinkled, dehydrated-looking leaves, dry leaf tips that turn brown and crispy. While underwatering is less common and easier to fix than overwatering, prolonged neglect will take its toll.
- Seasonal Adjustments: Water much less frequently in fall and winter when light levels drop and growth slows. Increase slightly during the active growing season (spring/summer), but still always wait for dryness.
Soil and Potting: Drainage is Non-Negotiable
- The Perfect Mix: Snake plants demand exceptionally well-draining soil. Standard potting mix is often too moisture-retentive.
- Ideal Recipe: Use a high-quality cactus/succulent potting mix. OR, amend a regular potting mix with 30-50% inorganic materials like perlite, pumice, coarse sand, or even small orchid bark chunks. The goal is water to flow through quickly.
- Pot Selection: Drainage Holes are Mandatory! Never, ever plant a snake plant in a pot without drainage holes. Terra cotta pots are excellent choices as they are porous and help wick away moisture. Ceramic or plastic pots work too, as long as they have holes.
- Pot Size: “Snug is Better” Snake plants actually prefer being slightly root-bound. Only repot when you see roots circling the bottom or poking out the drainage holes, or if the plant is physically pushing itself out of the pot. Typically, repotting every 2-3 years is sufficient. Choose a new pot only 1-2 inches larger in diameter than the old one. Too large a pot holds too much soil, which stays wet longer, increasing rot risk.
- Repotting Steps:
- Water the plant a few days before repotting (easier to remove).
- Gently remove from the old pot, teasing out the roots slightly.
- Place in the new pot with fresh, well-draining mix at the same depth it was before.
- Fill in around the sides, firming gently.
- Wait to Water: Do NOT water immediately after repotting. Wait at least 3-5 days (up to a week) to allow any disturbed roots to heal and prevent rot. Then resume your normal “soak and dry” routine.
Temperature, Humidity, and Fertilizing: They’re Not Fussy
- Temperature: Standard household temperatures are perfect (65°F – 80°F / 18°C – 27°C). Protect them from cold drafts and temperatures below 50°F (10°C), which can damage leaves.
- Humidity: Snake plants are incredibly adaptable to average home humidity levels. They don’t require misting and actually tolerate dry air very well. High humidity is also fine as long as the soil drainage is excellent.
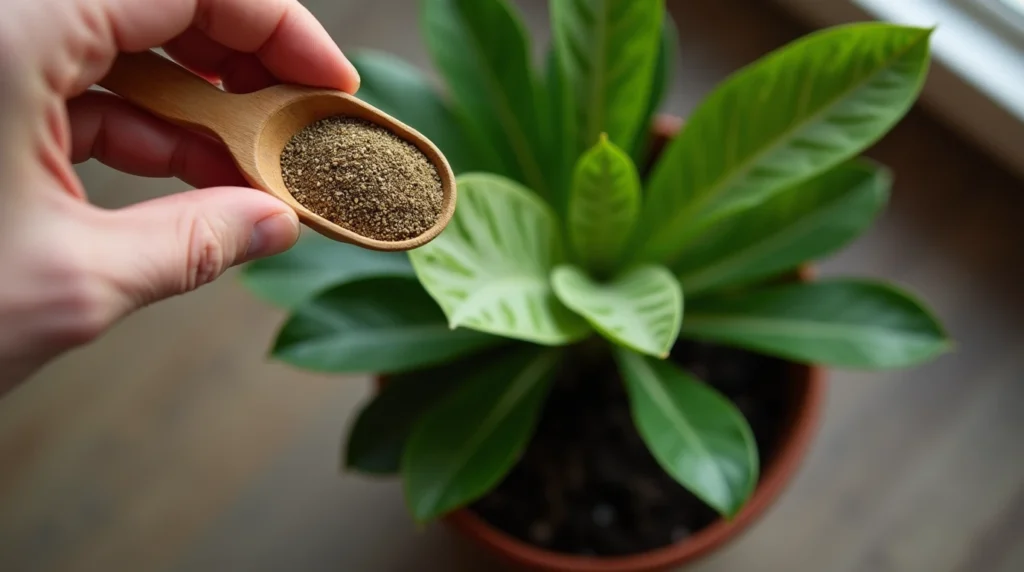
- Fertilizing: Less is More! Snake plants are not heavy feeders. Over-fertilizing can harm roots and cause leaf burn.
- When: Only during the active growing season (spring and summer).
- What: Use a balanced, liquid houseplant fertilizer (e.g., 10-10-10 or 20-20-20) OR a cactus/succulent fertilizer.
- How: Dilute it to half or even quarter strength.
- How Often: Once a month, at most. Many snake plant owners fertilize only 2-3 times per year and see excellent results. Skip fertilizing entirely in fall and winter.
Troubleshooting Common Snake Plant Problems
Even with the best care, issues can arise. Here’s how to diagnose and fix them:
Yellowing Leaves:
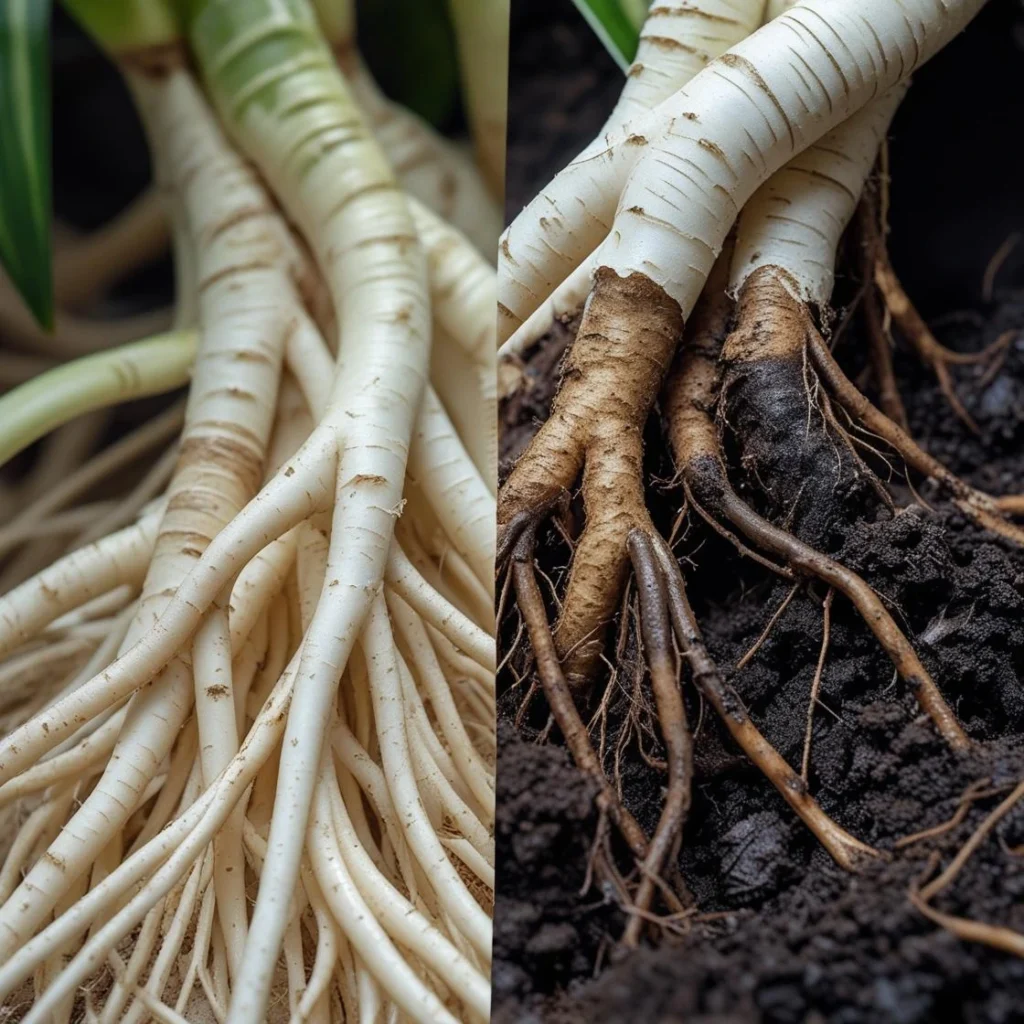
- Cause #1 (Most Common): Overwatering/Root Rot. Check the soil. If soggy, stop watering immediately. Remove the plant from its pot. Inspect roots: Healthy roots are firm and white/tan. Rotten roots are brown/black, mushy, and may smell bad.
- Solution for Rot: Remove all affected soil. Cut away any mushy, rotten roots with sterile shears. Repot in fresh, dry, well-draining mix into a clean pot (or sterilize the old one). Do not water for at least a week. Hope for the best (sometimes rot is too advanced).
- Cause #2: Natural aging of older, lower leaves. If only one or two bottom leaves are slowly yellowing while the rest look fine, this is likely natural senescence. Simply cut the leaf off cleanly at the soil line.
- Cause #3: Extreme underwatering over a very long period. Less common, but possible. Give a thorough soak and adjust your watering schedule slightly.
Soft, Mushy Leaves:
- Cause: Almost always advanced overwatering/root rot. The cells in the leaves have absorbed too much water and burst.
- Solution: As above for root rot. Affected leaves won’t recover; remove them.
Brown Tips or Edges:
- Cause #1: Underwatering/Dehydration. The leaf tissue dries out at the tips first.
- Solution: Give a thorough soak. Ensure you’re watering deeply enough when you do water.
- Cause #2: Low Humidity/Over-Fertilizing. While tolerant, very dry air combined with salts from fertilizer can cause tip burn.
- Solution: Flush the soil occasionally (run water through it for several minutes) to remove salt buildup. Don’t increase humidity drastically; just ensure watering is adequate. Cut back on fertilizer.
- Cause #3: Physical Damage. Bruising from bumps or pets. Cosmetic only.
- Solution: Trim the brown tip off neatly with clean scissors, following the leaf’s natural shape, if desired.
Leaves Falling Over/Drooping:
- Cause #1: Overwatering/Root Rot. Weak roots can’t support the leaves.
- Solution: Address root rot as above.
- Cause #2: Lack of Light. In very low light, leaves can become weak and etiolated (stretched), causing them to flop.
- Solution: Move the plant to a brighter location (gradually to avoid sunburn).
- Cause #3: Overcrowding/Pot Bound. While they like being snug, extremely root-bound plants in tiny pots can struggle to support tall growth.
- Solution: Repot into a slightly larger pot (1-2 inches wider) with fresh soil.
Pests (Rare, But Possible):
- Common Culprits: Mealybugs (look like tiny white cottony masses), spider mites (fine webbing, stippling on leaves), thrips (silvery streaks).
- Solution: Isolate the plant immediately! Wipe leaves with a damp cloth or cotton swab dipped in rubbing alcohol (test a small spot first). For larger infestations, use insecticidal soap or neem oil, following product instructions carefully. Repeat treatments as pests have multiple life cycles. Prevention through good care (especially avoiding overwatering stress) is best.
Styling Your Thriving Snake Plant: Form Meets Function
Choosing the Perfect Spot: Beyond the Windowsill
- Thanks to their tolerance and vertical growth, snake plants offer incredible styling versatility:
- Pot Power: Elevating Your Aesthetic The right pot makes a huge difference:
- Modern Minimalist: Sleek white ceramic, concrete, or matte black.
- Boho Chic: Textured terra cotta, woven baskets (use plastic liner with holes).
- Scandi Style: Light wood tones, simple geometric shapes.
- Color Pop: Choose a pot color that complements the plant’s variegation or contrasts beautifully.
- Propagation Pro Tip: Sharing the Snake Love Snake plants are incredibly easy to propagate:
- Leaf Cuttings in Water/Soil: Cut a healthy leaf into 3-4 inch sections (noting top/bottom orientation!). Allow cut ends to callous over for 1-2 days. Place bottom-end down in water or moist succulent mix. Rooting takes weeks to months. Note: Variegated types propagated this way may revert to all-green.
- Division: Best method during repotting to preserve variegation. Gently separate a pup (baby plant with its own roots) from the mother plant using your hands or a clean knife. Pot it up individually.
Seasonal Snake Plant Care Indoors: A Quick Calendar
- Spring/Summer (Growth Season): Water slightly more frequently (still only when dry!), provide bright indirect light, fertilize sparingly (1-2 times max at half-strength). Good time for repotting/propagation if needed.
- Fall/Winter (Dormancy/Slow Growth): Dramatically reduce watering – maybe only once every 6-8 weeks. Stop fertilizing entirely. Ensure it’s not near cold drafts. Tolerates lower light levels during this period. Growth will be minimal or stop.
Read More About Indoor Plants Care:
Snake Plant Care Indoors: (FAQ)
- Q1: How often should I water my snake plant?
- A: There’s no universal schedule! The only reliable method is the “soak and dry” approach: water deeply only when the soil is completely dry 2-3 inches down. This could be every 2 weeks in bright summer light or every 6-8 weeks in a dark winter corner. Always check the soil!
- Q2: Can snake plants really survive in low light?
- A: Yes, they can survive in very low light conditions, making them suitable for rooms without windows. However, they won’t thrive or grow much. For best results (growth, vibrancy, pest/disease resistance), provide bright, indirect light whenever possible. Low light is a fallback, not the ideal.
- Q3: Why are the tips of my snake plant turning brown?
- A: Brown tips are most commonly caused by underwatering (soil drying out too much for too long) or a buildup of salts/minerals from tap water or fertilizer. Less commonly, it can be due to very low humidity or physical damage. Check your watering habits first, and consider using filtered or distilled water if your tap water is very hard. Flush the soil occasionally.
- Q4: Are snake plants toxic to pets?
- A: Yes. Snake plants contain saponins, which are toxic to both cats and dogs if ingested. Symptoms can include nausea, vomiting, diarrhea, and drooling. While generally not fatal, it’s unpleasant. Keep snake plants out of reach of curious pets. Link to ASPCA Toxicity Page for Snake Plant
- Q5: My snake plant isn’t growing at all. What’s wrong?
- A: Slow growth is normal, especially outside spring/summer or in lower light. However, if it’s completely stalled, check these factors: 1) Light: Is it too dark? Move to brighter indirect light. 2) Pot Size: Is it extremely root-bound? Consider repotting slightly. 3) Watering: Are you chronically underwatering or overwatering? Both stunt growth. 4) Fertilizer: Have you ever fertilized? A tiny, diluted feed in spring/summer might help. Patience is key – snake plants are naturally slow growers indoors.
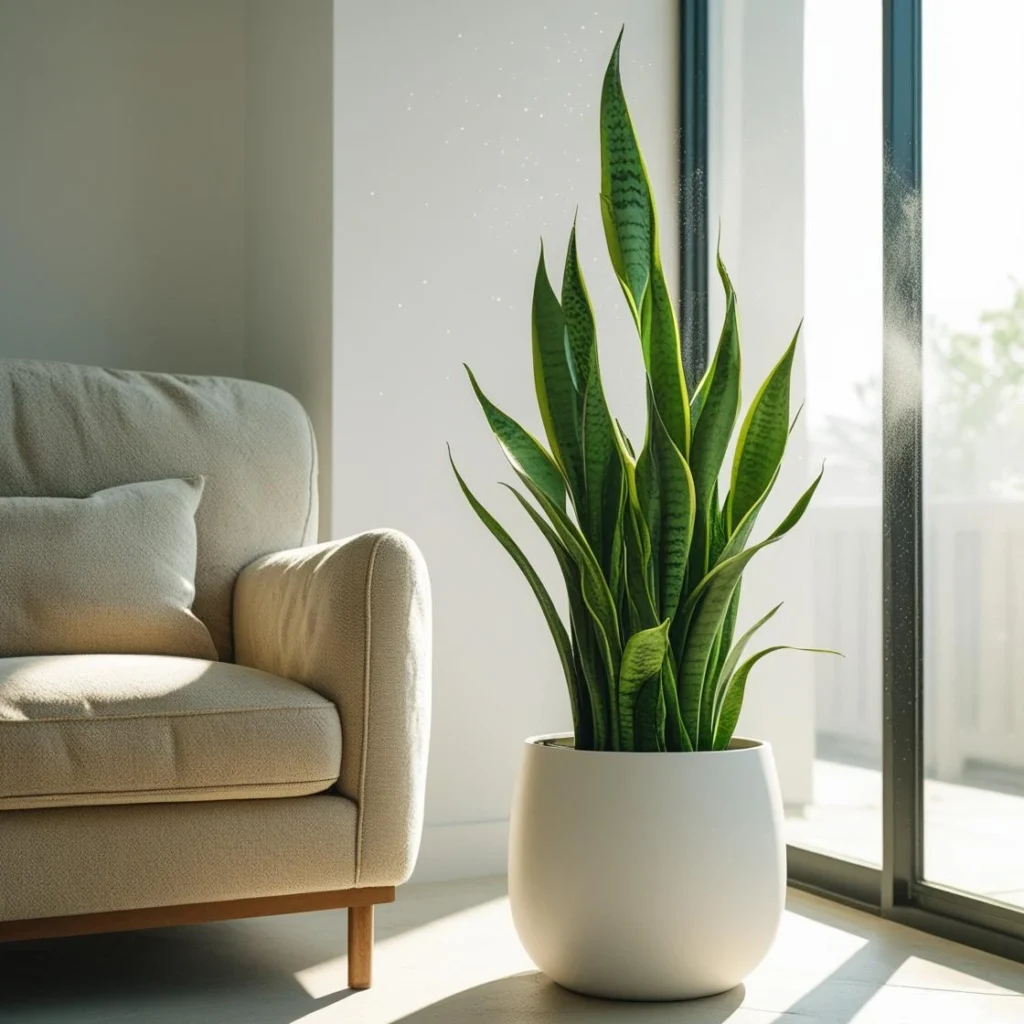
Image Placement 3: Close-up macro shot of water droplets on a snake plant leaf, emphasizing the “less is more” watering approach. Alt Text: “Proper watering technique for successful snake plant care indoors.”
Conclusion: Your Unshakeable Indoor Oasis Awaits
Mastering snake plant care indoors boils down to embracing their desert heritage: provide bright, indirect light, use a gritty, well-draining soil in a pot with holes, and most importantly – water deeply but infrequently, only when the soil is bone dry. Forget the watering schedule; your finger is your best tool. Fertilize sparingly, repot infrequently, and protect them from the cold. By resisting the urge to over-care, especially with water, you unlock the true potential of these architectural wonders. They’ll reward you with striking vertical lines, remarkable resilience, and cleaner air for years, even decades, to come.
So, banish the guilt over that past struggling snake plant! Armed with this knowledge, you’re ready to cultivate a truly unkillable, thriving piece of indoor greenery. What’s your biggest snake plant success story or lingering question? Share your experiences and tips in the comments below – let’s grow together!